
Your new pendant light is almost touching the table, and the chandelier brushes against heads as it passes. The cable supplied with a light fixture often exceeds the useful length, sometimes by several dozen centimeters. Shortening a suspension wire is accessible without electrical training, provided you follow a few safety rules and choose the right method according to the type of cable.
Shortening a fixture on a stretched or soundproof ceiling
On a concrete slab or standard drywall ceiling, shortening a suspension cable follows a straightforward procedure. On a stretched ceiling or one covered with a thick layer of sound insulation, several additional constraints come into play.
Read also : How to Easily Find and Book an Office That Meets Your Professional Needs
A stretched ceiling is a thermoplastic fabric held by profiles. You cannot drill directly into it or pull on it. The fixture’s attachment point goes through a rigid plate installed before the fabric is laid, with thermal reinforcement glued around the opening. If you need to shorten the cable, all the excess must fit in the space between the fabric and the original ceiling.
Have you noticed that this space varies depending on the installations? Sometimes it does not exceed a few centimeters. Winding a cable that is too thick in a small space causes overheating, especially with textile sheaths. The CSTB technical bulletin No. 45 from February 2026 documents an increase in overheating incidents related to poorly insulated shortenings on textile cables. The recommendation: add an additional silicone sheath around the winding.
Read also : How to Easily Share Your Files and Documents Online Securely
For ceilings with high sound insulation, the problem is different. The thickness of mineral wool or foam compresses the cable if it is folded in the false ceiling. The solution is to use a DCL (device for connecting light fixtures) recessed box that is deep enough to house the excess wire without contact with the insulation. To delve into each manipulation, refer to Place A’s practical guide that details the steps precisely.
Method for shortening the electrical wire of a pendant light
Before touching the cable, turn off the power at the circuit breaker. Not just at the wall switch. Check for the absence of voltage with a non-contact tester if you have one.
Determine the correct cable length
Measure the distance between the ceiling and the desired height for the bottom of the fixture. Add a margin of ten to fifteen centimeters for the connection in the base or canopy. It’s better to cut too little than too much: a shortened cable cannot be lengthened without a visible connection.
Above a dining table or living room, the base of the fixture is generally placed at face height of a seated person, without obstructing the view. Adjust according to your use.
Cut and reconnect properly
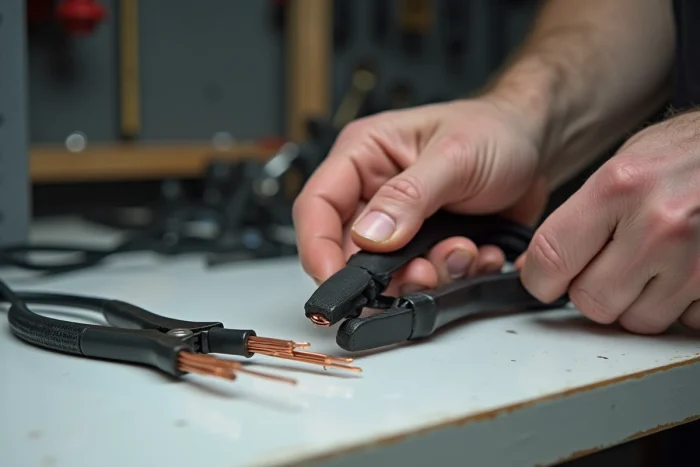
Once the length is defined, here’s the equipment to gather:
- A cutting plier to cut the cable and a stripping plier to remove the sheath for about one centimeter
- Quick connectors (like Wago) or a terminal block, depending on what the fixture’s canopy accepts
- A suitable screwdriver (flat or Phillips) to open the ceiling mounting base
Strip the wires to the length indicated by the chosen connector. Respect the color code of the wires: blue for neutral, brown or red for phase, green-yellow for ground if present. Insert each wire into the corresponding connector, then close the canopy.
Chain and textile cable suspensions: two special cases
Shortening a chain chandelier does not require touching the electrical wires. Simply remove links with needle-nose pliers. Open a link, remove the excess length, then close the connecting link. The electrical cable that runs through the chain must be shortened separately, following the method described above.
Textile cables (fabric-covered) pose an additional problem. When cut, the fibers fray. Apply a piece of adhesive tape around the cut area before cutting. This keeps the sheath in place and allows for a clean strip. A heat-shrink sleeve slipped over the end before reconnection protects the cable and prevents fraying in the long term.
Integrated LED suspensions: a simpler option for adjustment
Integrated LED suspensions operate on very low voltage on their internal circuit, distinguishing them from standard E27 socket models. This design allows for cable winding without the risk of electrical contact, an advantage confirmed by feedback from professional electricians on specialized forums.
On these models, the excess cable folds into the canopy or is held by a provided cable tie, without cutting anything. If you plan to move or change the height of the fixture later, this is a real advantage.
Common mistakes when shortening a fixture
Some pitfalls frequently arise:
- Forgetting to turn off the circuit breaker and working under voltage, even “quickly”
- Folding a large volume of cable into a too-small canopy, which compresses the connections and risks causing a false contact
- Using only insulating tape for a permanent connection instead of suitable connectors (terminal blocks, Wago)
- Neglecting the weight of the fixture during handling: get help or place the lamp on a stable support during the operation
A well-executed shortening takes about twenty minutes for a standard suspension. For a chain chandelier or a model with a stretched ceiling, allow a bit more time for preparation. The final result mainly depends on the quality of the electrical connection, not the cut itself. A well-tightened connector and a properly stripped cable are enough for a reliable and durable installation.